Wednesday, November 27, 2013

Nine Patch Part 2

So in Part 1 I showed you the first steps in loading a quilt onto Lola. So far I have spent an hour getting everything prepared and I haven't even taken my fist stitch.

Now I pull the top back so the all I have in front of me are the backing and the batting. I turn on my horizontal lock and make a stitching line across the top of the batting/backing. This line is a reference line for me to line up the quilt top.


Once that is down I then place to quilt top back into place with a little slack. This allows me to shift the top around as I need to get it lined up correctly. All this may seem like a lot of work and it is but it set the tone for the rest of the quilting. Getting the quilt sandwich all lined up and straight helps to keep the entire quilt on square.


 I line up the top center of the top with the center of the back and batting. For ease I have a mark on my leader (the leader is what I pin the back to.)


 Now to stitch the top down.


Now the top/batting/backing are all connected. This is called a quilt sandwich.


Now I am ready to begin quilting! Finally. I gather up everything I need while I am quilting and place that all in one spot. I have a scrap of batting that I use to hold thread that I have cut off...keeps it in one place and easy to stay tidy. I also have a pair of scissors, a seam ripper (whom I call Jack...Jack the ripper.), and a pair of tweezers for when I need to grasp a hold of a small thread.


Also I have a straight edge to aid in stitching on the diagonal.


Because I will be using a straight edge tool I add a large base to the bottom of my machine to give me a wider base.

  In the border I am first going to stitch in the ditch around the 9 patch's.


Apparently I was drunk when I stitched this line.


 Its amazing what just that little stitching can add such definition.


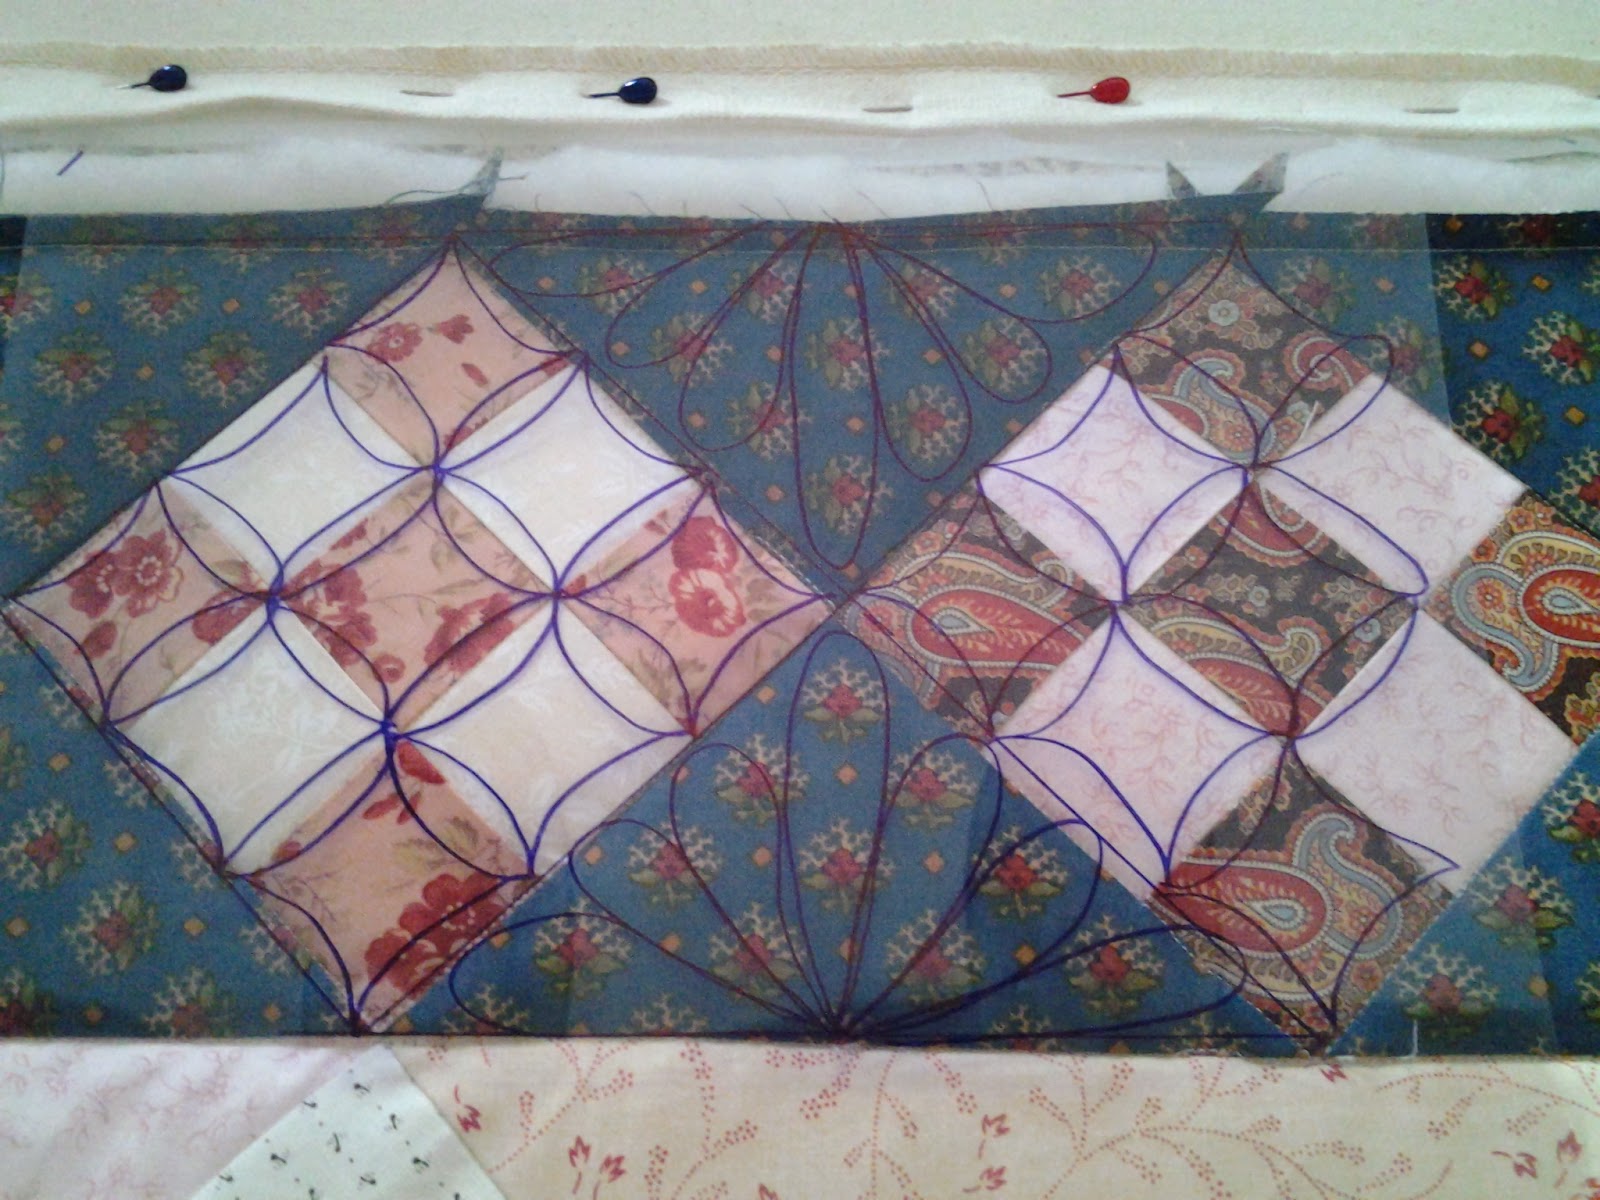
I haven't decided what I will quilt next. I have clear transparency film that I draw on to use to audition several ideas.


 I decided on the last option.

Tuesday, November 26, 2013

Nine Patch Part 1

This Nine Patch quilt is a project that I have been working on for quiet awhile. Its just one of my UFO's that I am now trying to get finished. The quilt is a king size that will end up being about 108" square. Nice and big!

 I have finally finished sewing the top together so I wanted to get it quilted as soon as possible. Today I thought I would show you about loading a quilt onto my longarm..I call it Lola.

This is Lola. She is a Gammil 24" Longarm, meaning the throat has 24" of space in which to quilt. This side has the top thread located at the back and threaded up to the needle at the front.


Now on this far side I am able to wind bobbins while I am stitching. Very handy as I always have a full bobbin ready to go when I need one. (This only works if I have 2 spools of thread that I am using.)


Lola is not "computerized" meaning it only moves if I move the machine. I bought a longarm so that I could control the artistic aspect of the quilting. There are 2 handles and on the top of each are the power buttons. The left handle has the button that just takes one stitch at a time and the right is the GO button. However I am also able to control what GO means via the touch pad at the front. I have an option that when I hit the GO button the needle starts going up and down and I better get moving or I can change it to only take a stitch when I move the machine. I use both functions for different applications.


Here is a close up of the touch pad. It gives me lots of options. Not only can I control when it takes a stitch but I can also decide on the stitch length. Upper left corner SPI:15 is 15 stitches per inch. I am able to lock the rails that the machine rides on into only moving vertical or horizontal. I can decide to have the needle stop with the needle down into the quilt or not. Also, lower right corner gives me my stitch count as well has how long the machine has actually stitched onto the quilt. This is somewhat handy as it only counts as the machine moves so it doesn't account for all the other things you do with the top that isn't actual stitching.


The first step to quilting on Lola is to load the backing. I do this by pinning the backing onto two rollers. The one on the top of the machine will eventually hold the entire quilt as I work my way down the quilt top. The other roller holds the backing flat under the table.


Next I need to load on the batting. For this quilt I am using a 100% wool batting. The batting just lays in between the layers. No need to pin it down as I will be stitching it along the top.


I then place the quilt top on to the backing and batting just to get it lined up.


I need to find the center of the top and bottom. I then have a roller that the bottom of the top gets pined onto. Having the top and the back pined onto rollers keeps the top taught while I am quilting.

Once I get everything pinned on and ready to go its time to get some stitching done. Look for Part 2.

Monday, November 25, 2013

Finished!

I finished knitting the shawl for my Mom's Christmas gift.


Now that its done and all the ends are woven in its time to block the shawl. First I place the shawl in a tub of hot water.


I let it sit and soak for a bit...30 mins or so making sure the wool yarn has soaked up as much water as it can hold.


I then take it and very gently squeeze out as much water as I can being careful not to felt the fibers. That would be BAD. Then I wrap the shawl in a towel and squeeze out even more water.


 Next I lay the shawl out on my blocking boards. These are interlocking foam blocks that I can configure to fit the project I am blocking.


Now I pin the thing into shape. I pin a lot.


Now I just need to let it sit and dry.


So why block you knitting? You are able to shape the piece into the way you want them to live. It makes your knitting more even and it sets the stitches. You can fix a lot of wonky stuff with blocking. Once the piece is blocked it will hold the form you blocked it to. Never blocked your knitting?  Give it a try.

Saturday, November 23, 2013

Dish Cloth Pattern

I was asked this week for my dish cloth knitting pattern. It is super simple and that's what I like about knitting this pattern. I can sit and watch a good TV show and not really pay attention to my knitting.

First Cast on 4 stitches in whatever way you like to cast on (CO 4)


Knit one row. (K)
Next Row Knit two stitches, yarn over (K2, yo)


Then Knit to the end of the row. (K to end)


Now you have added one stitch.

 
Continue the pattern of Knit 2, Yarn Over, Knit to the end (K2, yo, K to end)


 Once you reach your desired size. I prefer to increase until I have 45 stitches on my needles. Now it is time to decrease.
Knit one then knit 2 stitches together (K1, K2tog)


Next you want to Yarn over (yo)

Now you want to knit 2 together again then knit to the end. (K2tog, K to the end) Continue this until you are down to 4 stitches and knit this last row.


Now its time to Cast off (CO). To cast off you want to knit 2 (K2)

Then pass first knit stitch over the second stitch and remove that stitch from the needles.


Continue until you are down to one stitch left and then cut yarn and pull yarn through loop to close loop. Done. Just weave in the ends of your yarns and you are done :)


CO 4 stitches
Row 1: Knit
Row 2-45: K2, yo, K to end
Row 46-86: K 1, K2tog, yo, K2tog, K to end of row
Row 87: K4
Row 88: Cast off

Let me know if you have decided to join my challenge. Have fun and enjoy :)

Friday, November 22, 2013

Knitting To Go

Yesterday I showed you my Barn Raising Quilt that I make using left over sock yarn. I thought today I would show you my sock yarn kits.

I have several kits ready to go.


 When I get a new sock yarn I like to match it up with a pattern and place it in a zip lock bag and add some needles and I my kit is ready when I need to grab a project and go.


Knitting your own socks may seem a bit much but its a great take along project. If you have to wait at a Doctors office you can get a few rounds done. Sitting at the airport waiting for your flight...you are even able to take you knitting onto the plane. I have never had an issue with needles when flying. Long car rides are also great sock knitting time.


I will confess to having Second Sock Syndrome, its easy to get one sock knit but the second sock seems to drag on forever!